

How to Tie a Boat to a Dock [+ 10 Docking Tips]
There’s nothing quite like the freedom of being out on the water on a sunny summer’s day. But there comes a time when even the most seaworthy sailors must return to shore. Basic boat operation aside, docking is one of the most important skills in the boat owner’s tackle box. Read on for an in-depth guide to docking your watercraft.
Boat Tying Basics
Every boat owner needs a safe, secure place to stow their boat when not in use. Marinas are ideal for long-term, off-season storage, while dock slips and moorings provide a place to keep your boat for shorter periods of time between outings. Docking prevents your boat from slipping away when at rest, especially in choppy water or changing tides. It’s also crucial for boat owners to know how to secure their boat so that it doesn’t get scratched or damaged while afloat (more on that below).
But docking requires a lot more than a length of rope and a couple of knots — here are the must-know terms and accessories required for securing your boat at the dock:
Cleats
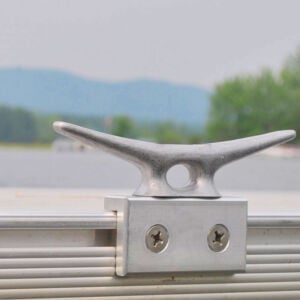
A cleat is a T-shaped piece of hardware bolted to either the railing of a boat or the edge of a dock. Cleats can be made of metal (like aluminum), nylon, or wood. Placed at regular intervals along a dock, cleats provide a secure hitching point for dock lines, provided they are properly bolted down. Some nylon dock cleats even come equipped with solar lights, so boaters can easily find them in low light.
Dock and boat cleats are meant specifically for tying dock lines to; You should never attempt to tie a dock line to another part of your boat. Most recreational boats have between five and nine cleats, depending on the size of the craft — usually two cleats on either side of the stern, two on either side of the bow, one at the bow peak, and more as needed in between. If you find that your boat or home dock does not have cleats, they are fairly easy to install.
Bumpers
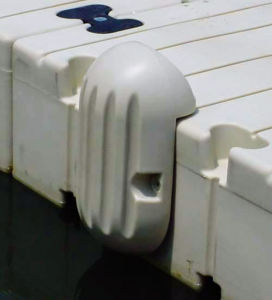
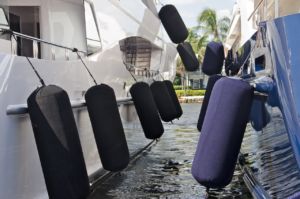
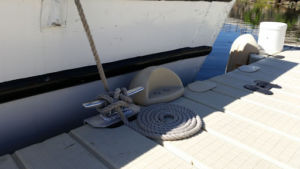
Bumpers are vinyl or rubber cushions that prevent your boat from making direct contact with a dock. Also called fenders, bumpers can be fastened both to a boat’s gunwales by lines or directly onto a dock. Boat bumpers hang over the dock side of a boat and can be flipped back inside the craft when not in use.


Pilings
If a dock does not have cleats, it may have pilings: long poles made of metal, plastic, or wood attached vertically along the edges or at the corners of the dock. They are generally more common on stationary docks, since they are used to anchor the dock to the ground, but they can appear on the topside of a floating dock. Pilings provide a more secure docking option than cleats for long-term dock stays.
Dock lines
Line — not “rope” — is the key connection between your boat and your dock. Double-braided or three-strand nylon line provides the most durability in wet environments and can hold a secure knot. Every boat should have two sets of dock lines: one for temporary, short-term dock stays and one for longer-term docking. The first line you use to tie up to a dock is called the spring line, and should be fastened to either the fore or aft cleat.
Key Considerations When Docking
Before you even get your boat in the water, you need to be sure you have all the right equipment and know-how to bring it safely back to shore.
- Check that your boat has cleats on all sides. If your boat is on the smaller side (a 15-foot rowboat, for example), two cleats at either end of each railing and one at the bow peak should be sufficient. The larger the boat, the more cleats it should have, evenly spaced along the railings between the fore and aft cleats.
- Check whether your home dock has cleats or pilings, and know which knots you need to securely tie up to each (more on that below). Be sure your dock lines are the appropriate diameter for the cleats you’ll be tying to.
- Prepare your bumpers or fenders. Make sure your boat bumpers are tethered by lines long enough that they can flip over the railing and hang between your boat and the dock.
- Know which lines (and how many) you’ll need to use for each kind of dock stay. You typically only need 3-4 lines per stay:
- Use one forward, one aft, and the bow line for a short stay.
- Use two forward and two aft lines for a longer stay.
- Check the wind direction, water current, weather forecast, and tide schedule (if in saltwater) every time you leave the dock, or cast off. Be sure you know how to operate your boat in any of the possible weather or marine conditions, including whether the tide level will affect your ability to dock safely.
- If the direction of the wind or current will push you into your dock upon your return, be sure to slow down more than you think you need to as you approach. Rule of thumb: Never approach your dock faster than you are willing to hit it.
Common Boating Knots
Now comes the fun part! There are a handful of secure knots every boat owner needs to know before setting sail. In nautical jargon, to “make fast” is to fasten securely — learn how to make fast to a dock with these knots.
Cleat hitch
This knot is the standard on docks that have cleats. Of course, you’ll need a cleat or T-shaped mooring hitch to execute it.

How to tie a cleat hitch:
- Wrap the line around the base of the cleat and back over the top of one horn.
- Wrap the line under the horn, then bring it diagonally over the top of the cleat and around under the opposite horn.
- Perform Step 2 in reverse on the first horn so that the wrapped line makes a figure 8 shape. Repeat as many times as necessary to ensure a secure fastening.
- Form an underhand loop with the loose end of the line and slip it over one horn of the cleat, making sure the loose end is held in place by the final wrap. Pull tight to secure.
| Pros | Cons |
|
|
Clove hitch
A clove hitch is the easiest knot to use on a dock piling, though it’s primarily recommended for calm waters only. Like the cleat hitch, it’s favored for its simplicity, both when casting on and off.

How to tie a clove hitch:
- Wrap your line once around the piling.
- Cross the free end of the line back over itself and around the piling again.
- Feed the free end of the line underneath the last wrap and pull tight to secure.
| Pros | Cons |
|
|
Pile hitch
For a more secure and reliable connection to a piling, the pile hitch is your answer. The pile hitch is only possible when you can access the top of a piling — which you typically can, unless it is too tall to reach.
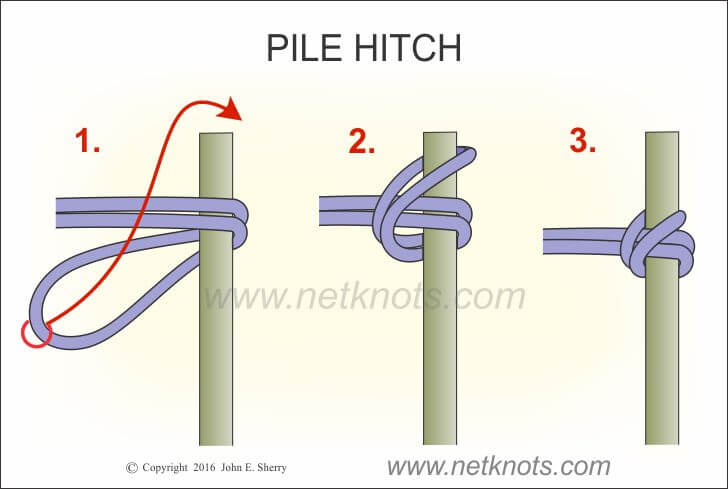
How to tie a pile hitch:
- Fold the end of your line to form a loop.
- Wrap the loop around the far side of the piling.
- Pass the looped end under the doubled line, then bring it up and slide it over the top of the piling.
- Pull tight.
| Pros | Cons |
|
|
Bowline knot
A bowline is the essential all-purpose knot on any boat. It can even be used to join two lengths of line together to form a longer line. The bowline is useful when you need to tie a secure loop at the end of a line, such as when fastening a bow line to the bow peak cleat (makes sense, considering the name, right?).

How to tie a bowline knot:
- Lay the free end of a line over your left palm, leaving some length hanging down.
- Grab onto the line in your palm and flip your hand back over to form a loop.
- Bring the loose end up through the loop from underneath.Wrap the loose end of the line under the standing (non-working)
- part of the line and bring it back down through the loop.
- To tighten, pull the loose end while holding onto the standing end.
| Pros | Cons |
|
|
Overhand knot
Chances are, you already know how to tie an overhand knot — it’s the simplest knot to tie! While not meant for tying a boat to a dock, it is useful to tie at the ends of lines to keep them from fraying and unraveling.

How to tie an overhand knot:
- Create a loop in the line.
- Pass the loose end of the line through the loop from the underside.
- Pull both sides of the line to tighten.
10 Docking Tips for Beginners
Of course, just like other skills, every new boat owner will need to learn the ropes (literally) and practice docking their boat multiple times before they get it right. It always helps to have a crewmate nearby, if only to remain on the dock and catch the lines when you reach your slip (spot at the dock).
The steps of the docking process may vary case by case, depending on the size of the boat, water depth, type of dock available, body of water, and weather conditions. Use the following steps as a general guide to docking your boat.
- As we mentioned before, you should plan for every part of your voyage before heading out. Consider the tide schedule (in saltwater settings), current, weather forecast, and time of day. Depending on the time of your return, you should know beforehand exactly how you’ll dock your boat.
- Before you approach the dock at the end of your outing, have all your dock lines ready, your bumpers deployed, and your crew aware of their duties.
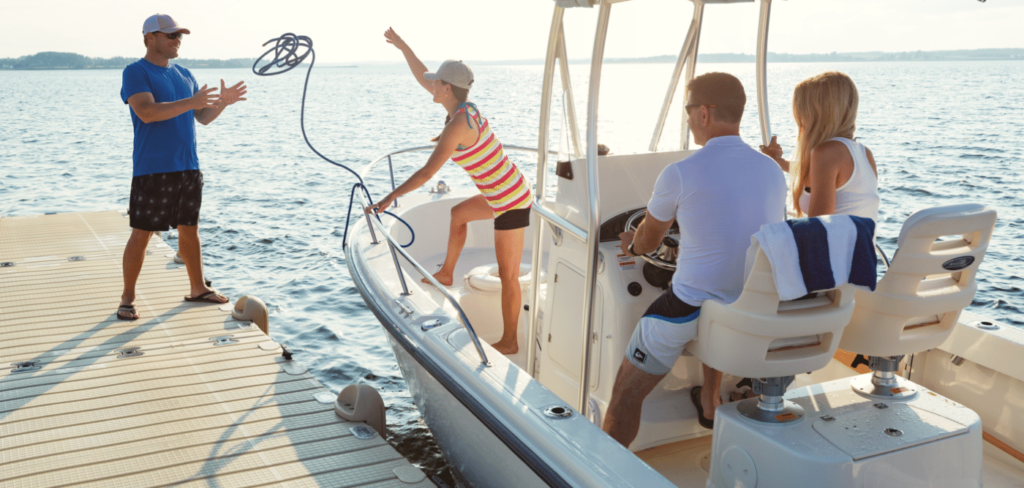
- Start by tossing a spring line to someone standing on the dock. They can tie the initial knot or hold the boat in place while you secure the rest of the lines.
- On a stationary dock, leave enough line length that you can tie each line at a diagonal angle from the boat (as opposed to perpendicular). This additional length will allow the boat to move back and forth, up and down in the water, which will prevent any damage caused by too-tight lines. This is not as much of a concern with floating docks, which can rise and fall with the water level.
As you become more experienced with this process, you’ll find ways of carrying out each step that work best for your craft or dock configuration. The number one thing to keep in mind is safety; if you’re not confident in a certain docking step or task, practice until you feel comfortable, preferably under the guidance of an experienced boater.
Here are some other best practices to keep in mind:
- Bumpers or fenders are a must-have, whether your dock is aluminum, plastic, or wood. Even plastic, which can be gentler on a boat than wood or metal, can cause hull damage through repeated contact.
- Tying up to dock cleats is sufficient for short-term stays in relatively calm conditions, from a few hours to a week. Pilings are recommended for longer-term dock stays of weeks or months, or in choppy conditions.
- If you plan to keep your boat at the dock for a longer period of time, consider installing mooring whips. These flexible fiberglass rods extend up from the side of the dock and lean out over the water toward your boat. In the case of inclement weather, the mooring whips will prevent your boat from crashing repeatedly into the dock bumpers, avoiding potential damage.
- Only use as many dock lines as you need: one for each cleat on your boat, including the one at the bow peak. At minimum, the stern, bow, and spring lines should always be utilized when your boat is docked, as they are the most secure. Too many dock lines can become tangled and pose a safety hazard.
- If there is a loose line on board, there should always be someone holding on to the end. Loose lines that fall in the water risk getting caught in your boat’s propeller, which causes both damage and safety hazards.
- Whoever is responsible for catching the line on a dock should be comfortable with tying the appropriate knots. If they are not, make sure they are able to hold tight to the line until someone with more experience can make it fast.
Follow these recommendations, and you’ll always be ready to cast off with confidence.
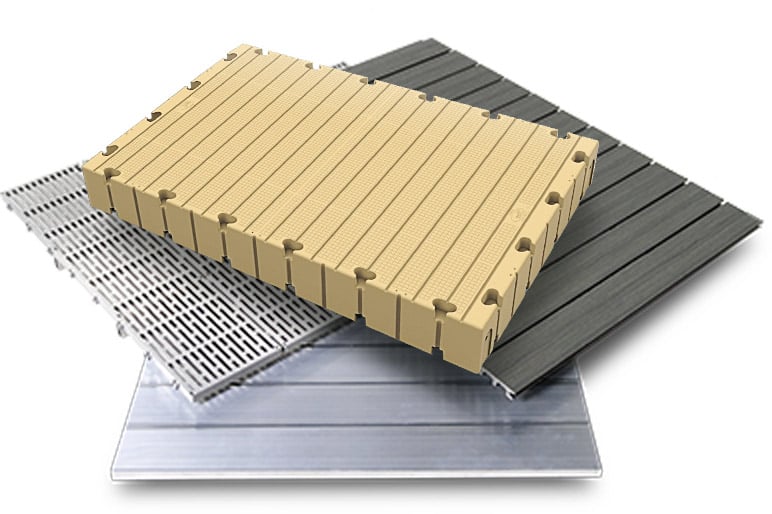
When it comes to durable, customizable dock solutions, FWM Docks offers aluminum and plastic docks for a range of boating craft and waterfronts. No matter the size of your craft — or your plans to upgrade — FWM has commercial and residential dock designs that can adjust to fit your waterfront’s changing needs. Modular configurations and easy-to-install accessories take the hassle out of docking and berthing your boat, so you can spend more time out on the water.
Check out the full range of stationary, floating, aluminum, and plastic dock solutions here.
Shop FWM Docks
Boat Docking FAQs
What are the best knots for docking a boat?
There are a handful of knots every boat owner should know for different docking circumstances. A cleat hitch is most effective for short-term stays at a dock with cleats. A pile hitch or clove hitch is ideal for tying onto a piling.
What is the difference between mooring and docking?
“Docking” is generally used to describe short-term stays at a dock, as well as the act of securing your boat to a dock. “Mooring” is securing your boat to a fixed object for a long-term stay, whether that’s a dock, mooring buoy, quay, or jetty. Mooring is also sometimes called berthing.
Can I add cleats to my dock?
Absolutely! Cleats are available from most dock manufacturers and at most boating supply retailers. If you already have a boat, be sure to choose cleats that are large enough to accommodate your lines (or vice versa). In general, every 1/16 of a line’s diameter equals one inch of cleat length (Ex. A line that’s ½ inch in diameter needs an 8-inch cleat).
Is it safe to tie up to a floating dock?
Yes, provided the dock is securely anchored and your boat has bumpers or fenders.
Will a plastic dock damage my boat?
Any type of dock has the potential to damage a boat without the right protective measures. Boats can become scratched from repeatedly bumping or rubbing against a dock, and approaching a dock too fast can cause hull damage. Always use bumpers or fenders to protect your boat and the dock, and deploy them well before you make your (slow!) landing.